

Why blown film defects are often difficult to solve
Blown film extrusion is sensitive because material, screw speed, melt temperature, die flow, cooling air, bubble air, nip speed and winding tension all work together. One small change can affect several things at once: thickness, frost line height, layflat width, clarity, strength and winding quality.
A good troubleshooting method avoids random adjustment. First describe the defect. Then decide whether it is mainly a material problem, an extruder problem, a die and cooling problem, a tower problem or a winding problem. After that, change one parameter at a time and give the line time to respond.
Resin grade, moisture, contamination, regrind, additives, colour masterbatch and material lot can all create defects.
Temperature profile, screw speed, head pressure, screen pack, die gap, BUR, frost line and cooling all influence the film.
Die centring, air ring, bubble cage, collapsing frame, nip rolls, treatment station and winder can all create or amplify problems.
A professional troubleshooting method
Before changing temperatures or touching die bolts, make a simple record. Many problems are made worse because several settings are changed at the same time. When that happens, it becomes difficult to know which change helped and which change created a new problem.
Name the defect
Use clear terms: gels, die lines, MD gauge variation, TD gauge variation, blocking, wrinkles, haze, melt fracture or surging. Keep physical film samples.
Record the actual line condition
Note material, lot number, regrind level, temperatures, screw speed, melt pressure, melt temperature, frost line, air settings, nip speed and winder tension.
Separate source zones
Ask where the defect first appears. Does it begin at the die, in the bubble, at collapsing, after the nip, at treatment or at winding?
Change one thing
Make one controlled adjustment. Wait for the line to stabilize. Take a marked sample and compare it with the previous sample.
Confirm the solution
Run long enough to see if the defect returns. Record the corrected settings for the next production order.
Prevent recurrence
Convert the solution into a checklist, recipe note, maintenance action or material test requirement.
Testing a new material, additive or recycled content?
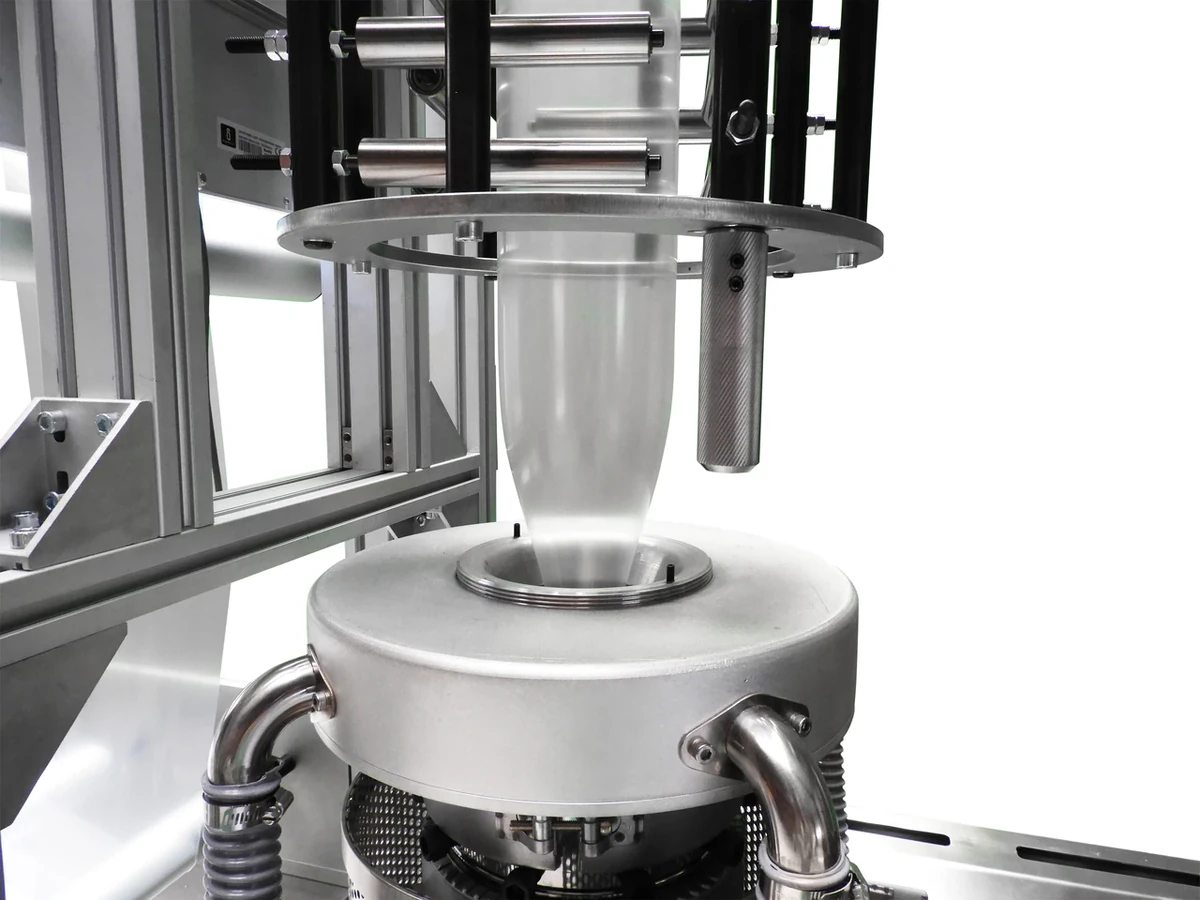
LabEx laboratory blown film lines make it possible to test material behaviour, drying, additives, colour, gels, clarity and bubble stability before using the production line.
Where common blown film problems normally start
Many defects are visible in the finished roll, but the root cause can be much earlier in the line. Gels may begin as material degradation in the screw or die. Gauge bands may begin at the die gap or air ring. Wrinkles may be created by bubble instability and then amplified by the collapsing frame and winding tension.
| No. | Line area | Main components | Troubleshooting focus |
|---|---|---|---|
| 01 | Material conveying and dosing | Vacuum loader; gravimetric blender | Check whether raw material, regrind, masterbatch and additives are fed consistently before adjusting the extruder. |
| 02 | Extruder | Feed throat; screw; barrel; thrust bearing; mixing section; main drive motor; gearbox and coupling; melt filtration and screen changer | Use this area when output, pressure, melt temperature, gels, unmelted particles or motor load are unstable. |
| 03 | Heating, cooling and process control | Barrel heating zones; cooling fans; water-cooled feed zone; temperature sensors; melt temperature sensor; melt pressure sensor; pressure alarm and shutdown | Verify real temperature control, cooling and melt pressure before changing recipes or blaming the resin. |
| 04 | Die head | Blown film die head; spiral mandrel die; multi-layer die; die lips; die heating zones; die gap adjustment | Inspect this area for die lines, port lines, gauge bands, flow imbalance, black specks and die lip contamination. |
| 05 | Bubble forming and cooling | Air ring and air ring cooling system; internal bubble cooling, IBC; bubble air control | Focus here when the frost line, bubble shape, clarity, cooling uniformity or bubble stability is changing. |
| 06 | Tower, cage and haul-off | Tower structure; calibration cage; collapsing frame; gusseting unit; nip rolls; haul-off unit; oscillating haul-off | Check this area for wrinkles, width variation, bubble guiding issues, uneven collapse and nip-related tension differences. |
| 07 | Measurement and film control | Thickness gauge; rotating thickness scanner; automatic gauge control; profile display; data logging | Use measurements and trends to separate real process variation from visual impressions and operator assumptions. |
| 08 | Web handling, treatment and slitting | Web guide; spreader roll or banana roll; idler rolls; corona treater; slitting knives; edge trim system | Inspect this area for web wander, scratches, poor printability, slitting defects and edge quality problems. |
| 09 | Winding and roll handling | Winder; surface, centre or turret winder; contact roll; air shaft; core loading system; roll unloading system | Use this area when defects mainly appear as blocking, telescoping, loose rolls, hard rolls, starring or poor roll geometry. |
| 10 | Electrical control, automation and safety | Main electrical cabinet; PLC; HMI touch screen; frequency converters; temperature controllers; safety system; recipe system; remote access | Check controls when a repeatable defect follows a recipe error, sensor fault, unstable drive, heater fault or automation setting. |
Uneven material flow
Typical symptom: Output, melt pressure or motor load moves up and down. Film gauge changes in machine direction and the bubble may pulse.
Likely causes
- Unstable feeding at the hopper or feed throat
- High or inconsistent regrind content
- Material bridging or sticking in the feed section
- Solid bed break-up caused by poor melting
- Dirty screen pack increasing head pressure
- Worn screw or barrel reducing specific output
- Drive speed variation or unstable control
What to check first
- Watch melt pressure, motor current and screw speed at the same time.
- Check if the pressure fluctuation follows screw rotation or if it is random.
- Inspect the feed throat temperature, hopper flow and regrind dosing.
- Compare current kg/h per rpm with previous production records.
Possible solutions
- Stabilize feed by cleaning the hopper, checking feed throat cooling and controlling regrind ratio.
- Change or clean the screen pack if head pressure has increased.
- Adjust the temperature profile to improve melting.
- Reduce excessive regrind or use more uniform regrind particle size.
- Inspect screw and barrel wear if output per rpm has dropped over time.
- Use a LabEx laboratory extruder to compare material lots before changing production settings.
High melt temperature
Typical symptom: The melt is hotter than expected, cooling demand is high, and film may show degradation, gels, smell or reduced mechanical properties.
Likely causes
- Incorrect barrel or die temperature profile
- Dirty screen pack creating high pressure and long residence time
- Worn screw causing lower pumping efficiency and more shear heating
- Material lot or formulation change
- Too much screw speed for the screw design
- Excessive mechanical work from mixing elements or high back pressure
What to check first
- Measure real melt temperature with a suitable melt probe, not only controller setpoints.
- Compare melt pressure with normal production data.
- Check if the problem appeared slowly over time or immediately after a material change.
- Check if barrel cooling fans or water circuits are running continuously.
Possible solutions
- Replace clogged screen packs and check pressure drop.
- Lower unnecessary back pressure when the melt is already homogeneous.
- Review screw design if the problem is permanent for this material.
- Reduce residence time by avoiding low output operation with high barrel temperature.
- Keep a stable approved recipe sheet for each material.
Low output at the same screw speed
Typical symptom: The line produces fewer kg/h at the same rpm, or output must be maintained by running higher screw speed than before.
Likely causes
- Blocked or too fine screen pack
- High pressure restriction in the melt path
- Worn screw flights or barrel
- Changed material viscosity
- Poor feeding or bridging
- Incorrect temperature profile reducing melting efficiency
What to check first
- Record kg/h at several fixed screw speeds.
- Check head pressure and pressure trend before and after screen changes.
- Inspect material bulk density and regrind ratio.
- Compare current run data with an earlier good run.
Possible solutions
- Replace the screen pack or review screen mesh selection.
- Clean melt pipes, adapter and die if contamination or restriction is suspected.
- Inspect screw and barrel if low output develops slowly.
- Use a stable material feed and avoid uncontrolled regrind additions.
- Adjust feed zone and early barrel temperatures to improve solids conveying and melting.
Gauge variation and thickness bands
Typical symptom: Film thickness is not uniform across the web, or the roll builds hard and soft areas. Variation can be in machine direction or transverse direction.
Likely causes
- Extruder surging causing MD variation
- Die not centred or wrongly adjusted
- Uneven die lip temperature
- Uneven cooling around the bubble
- Air ring off-centre, dirty or with blocked passages
- Bubble instability or frost line movement
- External air drafts near the bubble
What to check first
- Separate MD variation from TD variation. They have different causes.
- Check die gap with correct procedure and avoid large die bolt movements.
- Check air ring level, centring, air hoses, filters and plenum cleanliness.
- Look at the frost line. A non-uniform frost line often shows where cooling or flow is uneven.
Possible solutions
- Stabilize the extruder first. Do not adjust the die to correct surging.
- Centre the die and air ring carefully after the system is at operating temperature.
- Clean die lips, air ring and cooling passages.
- Check for heater band or thermocouple problems on die zones.
- Protect the bubble from drafts and heat sources.
- Use only small die bolt corrections and allow the film to respond before the next change.
Bubble instability, breathing and flutter
Typical symptom: The bubble moves, breathes, oscillates or changes shape. Film width and gauge may move, and wrinkles can appear before the nip.
Likely causes
- Unstable output from the extruder
- Frost line too high or too low for the material and output
- Air ring velocity too high or not uniform
- IBC sensor or valve instability
- External drafts or tower vibration
- Bubble cage too tight or too loose
- Material with low melt strength or unsuitable grade
What to check first
- Identify the instability type: breathing, flutter, sag, snaking or frost line oscillation.
- Check if melt pressure is stable.
- Inspect air ring centring, cooling air temperature and blower stability.
- Check IBC supply and exhaust if used.
- Look for air leaks through the nip or bubble inflation system.
Possible solutions
- Stabilize output before changing cooling or die settings.
- Adjust air ring and cooling gradually.
- Check IBC control sensor position and valve response.
- Protect the tower from drafts.
- Centre the cage and set it to support the bubble without forcing it.
- Use a resin or blend with better melt strength when the material is the limitation.
LabEx Insight
Bubble instability, gauge variation and wrinkles can often be reproduced on a LabEx blown film line using small material quantities. This gives process engineers a practical way to compare material lots, cooling settings and bubble stability before using production time.
Wrinkles before or after the nip
Typical symptom: Film shows edge wrinkles, centre wrinkles, diagonal wrinkles, crease lines or MD wrinkles. Wrinkles can start at the bubble, collapsing frame, nip, rollers or winder.
Likely causes
- Gauge variation or bubble instability
- Die, air ring, cage or nip not aligned
- Collapsing frame angle too large or too small
- Non-uniform drag on collapsing frames
- Excessive or changing web tension
- Rollers out of alignment or not turning freely
- Film too hot or too cold when collapsed
What to check first
- Find where the wrinkle first appears. Do not only inspect the final roll.
- Check if wrinkles are at the edge, centre, diagonal or in machine direction.
- Check collapsing frame angle, cleanliness and symmetry.
- Check nip pressure, roller alignment and downstream tension.
Possible solutions
- Correct bubble stability and gauge first.
- Centre die, air ring, cage, collapsing frame and nip.
- Adjust collapsing frame angle according to wrinkle type.
- Clean rough or sticky contact surfaces.
- Reduce excessive tension and check downstream drive synchronization.
- Optimize cooling so film reaches the nip at a stable temperature.
Melt fracture, sharkskin and orange peel
Typical symptom: Film surface looks rough, matte, rippled or like orange peel. The defect can become worse at higher output.
Likely causes
- Shear stress too high at the die lips
- Melt temperature too low for the output rate
- Die gap too narrow for the material and rate
- Material grade with poor processability
- Die lip temperature too low
- Insufficient or unsuitable processing aid
What to check first
- Check whether the defect improves when output is reduced.
- Compare melt temperature with the material supplier recommendation.
- Inspect die lip condition and die temperature control.
- Check whether it is true melt fracture or interfacial instability in coextrusion.
Possible solutions
- Increase melt or die lip temperature gradually if material allows.
- Reduce output or shear rate.
- Increase die gap when mechanically possible.
- Use a more suitable film grade or add a compatible polymer processing aid.
- Clean and inspect die lips if roughness is localised.
Die lines and port lines
Typical symptom: Long lines appear in the machine direction. They may be fixed in one position and can become weak points in the film.
Likely causes
- Dirty or damaged die lips
- Degraded polymer lodged near the die exit
- Scratched die surface
- Poor melt filtration
- Clogged ports or spirals in the die
- Non-uniform die temperature
What to check first
- Check if the line stays at a fixed position across the web.
- Clean the die lip locally with suitable soft tools.
- Check screen pack condition and pressure trend.
- Inspect if the defect appeared after a material or colour change.
Possible solutions
- Clean die lips using approved brass or copper tools.
- Purge the system and remove degraded material.
- Increase filtration where suitable and change screen packs.
- Repair damaged die surfaces through proper machining or polishing.
- If port lines are from die design or flow balancing, allow stabilization and verify die temperature uniformity.
Gels, fisheyes, unmelts and black specks
Typical symptom: Small spots, hard particles, clear gels, black specks or fisheyes are visible in the film and may create holes or weak points.
Likely causes
- Degraded polymer in screw, barrel, adapter or die
- Poor melting or unmelted particles
- Contaminated raw material or regrind
- Long residence time and hot spots
- Inadequate purging between materials
- Poor screen pack selection
- Moisture or crosslinked particles in resin
What to check first
- Classify the defect: clear gel, black speck, unmelt, contamination or bubble.
- Check if specks increase during long stops or start-up.
- Inspect purge history, melt temperature and pressure.
- Check material handling system and regrind cleanliness.
Possible solutions
- Purge and clean the screw, barrel, screen changer and die.
- Correct temperature profile for complete melting without overheating.
- Improve filtration and screen pack maintenance.
- Reduce residence time during stops.
- Improve raw material and regrind quality control.
- Use LabEx testing to compare suspect lots before production.
Voids, bubbles, raindrops and moisture marks
Typical symptom: Film shows small bubbles, voids, raindrop marks, foaming, streaks or surface defects that look like gas or moisture release.
Likely causes
- Moisture in hygroscopic materials such as PA, EVOH, PET or TPU
- Condensation in material handling or feed area
- Dryer not working correctly
- Contaminated or wet regrind
- Volatile additives or contamination
- Incorrect venting or trapped air
What to check first
- Check material moisture level and drying record.
- Inspect dryer dew point, temperature, airflow and residence time.
- Look for condensation around material handling and feed throat.
- Check if the defect disappears with dry virgin material.
Possible solutions
- Dry moisture-sensitive materials according to supplier recommendations.
- Check dryer function and hopper residence time.
- Use sealed material handling after drying.
- Avoid wet regrind and open storage.
- Purge and clean if contaminated material entered the system.
LabEx Insight
Moisture, gels, black specks and haze are strongly linked to material condition and processing window. LabEx trials help compare drying, filtration, melt temperature and recycled content under controlled conditions.
Poor clarity, high haze and low gloss
Typical symptom: Film looks milky, dull, hazy or less transparent than expected. Gloss may be low and product appearance may be rejected.
Likely causes
- Wrong resin or incompatible blend
- Slow or uneven cooling
- Melt temperature not suitable for the material
- Surface roughness from melt fracture or die lines
- Contamination or gels
- Interfacial instability in coextrusion
- Additive or regrind level too high
What to check first
- Check if haze is internal, surface related or caused by contamination.
- Compare with a known good resin lot.
- Check cooling air temperature, air ring uniformity and frost line.
- Inspect die lines, gels and surface roughness.
Possible solutions
- Use the correct clarity grade and compatible additives.
- Optimize melt temperature and cooling rate.
- Clean die lips and improve filtration.
- Reduce incompatible regrind or high additive loading.
- For coextrusion, adjust layer ratios and material viscosity match.
Blocking and film sticking together
Typical symptom: Film layers stick together on the roll or after collapsing. Opening the film is difficult and converting becomes unstable.
Likely causes
- Film collapsed too hot
- Insufficient cooling before nip
- Winding tension or nip pressure too high
- Low antiblock level
- Excessive corona treatment
- High coefficient of friction or tacky additives
- Roll stored under heat or pressure
What to check first
- Check film temperature at the nip and winder.
- Check frost line height, cooling air and line speed.
- Check antiblock, slip and treatment settings.
- Check roll hardness and storage conditions.
Possible solutions
- Improve cooling or reduce output.
- Reduce nip pressure and winding tension where possible.
- Increase or correct antiblock level.
- Avoid overtreatment.
- Control roll storage temperature and pressure.
- Test formulation changes on a LabEx line before production.
Poor heat seal or weak sealing
Typical symptom: Film does not seal well, seals open, seal strength is low or seal appearance is inconsistent.
Likely causes
- Wrong seal layer material or contaminated seal layer
- Overtreatment or wrong treatment side
- High slip, antiblock or incompatible additive at the sealing surface
- Oxidation or degradation of seal layer
- Gauge variation in seal area
- Incorrect sealing temperature, time or pressure downstream
What to check first
- Confirm seal side and treatment side.
- Check seal layer formulation and additive levels.
- Measure treatment level and compare with specification.
- Check gauge variation where sealing occurs.
Possible solutions
- Use correct seal layer resin and formulation.
- Adjust treatment to required level only.
- Reduce additive migration at sealing surface.
- Improve gauge uniformity.
- Coordinate extrusion settings with bag making or sealing conditions.
Poor printability and treatment problems
Typical symptom: Ink does not wet or bond properly. Print may rub off, have pinholes or show poor adhesion.
Likely causes
- Insufficient corona treatment
- Wrong side treated
- High slip or additive migration
- Dirty or contaminated film surface
- Treater gap or power not correct
- Film stored too long or in poor conditions
- Overtreatment causing seal problems
What to check first
- Measure dyne level on the correct side.
- Check treater power, electrode gap and roll condition.
- Check if slip level has changed or if film aged before printing.
- Check surface contamination from rollers or environment.
Possible solutions
- Set treatment level to the print requirement.
- Confirm correct treatment side and roll winding direction.
- Control slip and additive package.
- Clean the treater and maintain electrodes.
- Store film properly and print within a suitable time window.
Streaks, colour variation and poor pigment dispersion
Typical symptom: Film colour is not uniform. Streaks, bands, pigment specks or shade variation appear across or along the film.
Likely causes
- Poor masterbatch dosing or blending
- Incompatible carrier resin
- Insufficient melting or mixing
- Agglomerated pigment
- Material contamination during colour change
- Low back pressure or unsuitable screw design
- Moisture or poor drying in masterbatch
What to check first
- Check dosing unit calibration and actual let-down ratio.
- Check masterbatch carrier compatibility.
- Inspect feed throat and hopper for segregation.
- Compare with neat resin and with a different masterbatch lot.
Possible solutions
- Use compatible masterbatch and correct dosing.
- Improve blending and avoid segregation.
- Increase mixing by adjusting back pressure or screw design if possible.
- Purge properly between colour changes.
- Run small trials on a LabEx laboratory extruder before ordering larger masterbatch quantities.
Scratches, roller marks and surface damage
Typical symptom: Film has scratches, scuff marks, roller marks or repeated surface damage after the bubble is collapsed.
Likely causes
- Rough or damaged rollers
- Dirty collapsing frame or guide surfaces
- Rollers not turning freely
- Excessive web tension
- Foreign particles on contact surfaces
- Static attracting dust
What to check first
- Locate where the scratch first appears by following the web upstream.
- Inspect rollers, collapsing frame, guides and idlers.
- Check roller bearings and roll drag.
- Check static level and dust near the tower.
Possible solutions
- Clean and polish contact surfaces.
- Replace or repair damaged rollers.
- Reduce excessive tension and check roller alignment.
- Use antistatic devices when static attracts dust.
- Keep the tower clean and protect film contact areas.
Splitty film and low mechanical strength
Typical symptom: Film tears too easily, splits along lines or fails mechanical tests even when thickness is correct.
Likely causes
- Material grade not suitable for application
- Too much degraded regrind
- Poor molecular orientation balance
- Long residence time causing degradation
- Die lines acting as weak points
- Wrong BUR, DDR or frost line conditions
What to check first
- Test MD and TD tensile, tear and impact properties.
- Check formulation and regrind level.
- Inspect for die lines where tears start.
- Review BUR, TUR, frost line and cooling settings.
Possible solutions
- Use a resin grade with correct mechanical properties.
- Reduce degraded regrind and improve regrind quality control.
- Clean die lips and remove die lines.
- Adjust process stretching and frost line to balance MD and TD properties.
- Use LabEx film testing to compare recipes before production approval.
Chatter marks and repeating bands
Typical symptom: The film or roll shows repeating marks, vibration patterns, bands or unstable visual texture.
Likely causes
- Mechanical vibration in tower, nip, haul-off or winder
- Unstable nip drive or roller speed
- Air ring vibration or unstable air flow
- Extruder output pulses
- Roller eccentricity or bearing problems
What to check first
- Check if mark spacing matches screw speed, nip speed or roller rotation.
- Listen for mechanical noise and vibration.
- Check nip drives, roller bearings and tower stability.
- Check air ring mounting and air supply stability.
Possible solutions
- Stabilize mechanical drives and replace worn bearings.
- Check drive tuning and speed control.
- Reduce unstable air flow and correct air ring mounting.
- Separate process surging from mechanical vibration by comparing marks with pressure trend.
Applesauce, rough melt and surface contamination
Typical symptom: Film surface contains a rough, speckled, uneven or lumpy appearance that can look like small dispersed defects.
Likely causes
- Poor mixing or unmelted particles
- Contaminated material or degraded particles
- Temperature too low for complete melting
- Dirty screw, barrel, adapter or die
- Screen pack too open for contamination level
What to check first
- Inspect film under light and magnification.
- Compare defect with gels, unmelt and contamination samples.
- Check purge history and screen pack condition.
- Check if raising temperature slightly reduces the defect.
Possible solutions
- Improve melt homogeneity and check screw performance.
- Purge and clean the melt path.
- Increase temperature only when unmelt is confirmed.
- Improve filtration and remove contaminated raw material.
- Review material preparation and regrind cleanliness.
Material bridging in hopper or feed throat
Typical symptom: The extruder starves suddenly or intermittently. Screw speed remains constant, but output and pressure drop.
Likely causes
- Feed throat too hot
- Poor flowing regrind, fluff or powder
- Material sticking due to moisture or static
- Hopper geometry causing hang-up
- Large or irregular regrind pieces
- Cooling water flow problem in the feed throat
What to check first
- Check hopper level and whether material flows uniformly.
- Feel or measure feed throat temperature safely.
- Inspect regrind particle size, fines and fluff content.
- Check feed throat cooling water or air flow.
Possible solutions
- Restore feed throat cooling and keep the throat below sticking temperature.
- Improve regrind size consistency.
- Use agitation, crammer feeding or better hopper geometry for difficult materials.
- Keep material dry and clean.
- Do not compensate for bridging only by increasing temperatures.
Recycling Insight
Many defects in recycled film start before the extruder. Regrind size, fines, dust, moisture and contamination must be controlled before changes are made to the die, air ring or winding system.
Screen pack blockage or pressure rise
Typical symptom: Head pressure increases, output drops, melt temperature may rise and defects may increase.
Likely causes
- Contaminated resin or regrind
- Excessive gels or degraded particles
- Screen mesh too fine for the material cleanliness
- Long run without screen change
- Poor purge after colour or material change
What to check first
- Trend head pressure over time.
- Compare pressure before and after screen change.
- Inspect removed screens for contamination type.
- Check whether the defect increases with pressure.
Possible solutions
- Change screen pack at defined pressure limit.
- Use the correct screen pack sequence and support screen.
- Improve raw material and regrind filtration upstream.
- Purge correctly before installing a clean screen pack.
- Consider continuous filtration for dirty recycled materials.
Foreign contamination in resin stream
Typical symptom: Random black specks, holes, gels, weak points or hard particles appear in the film.
Likely causes
- Open bags, uncovered hoppers or dirty silos
- Metal, paper, dust or incompatible polymer in the feed
- Poor housekeeping around loaders and grinders
- Contaminated regrind or edge trim
- Material handling hoses producing dust or angel hair
What to check first
- Inspect hopper, loader filter, magnets and material stream.
- Cut open defects and check under magnification.
- Run virgin material from a sealed source.
- Check regrind and trim return system separately.
Possible solutions
- Cover hoppers and containers.
- Clean silos, loaders, filters and transfer lines.
- Use magnets and good material handling practice.
- Separate and label regrind by material type.
- Remove suspect material before it reaches the extruder.
Wrong resin grade or changed melt flow
Typical symptom: A known recipe suddenly behaves differently. Bubble stability, sealability, haze, output or mechanical properties change.
Likely causes
- Wrong resin delivered or selected
- Different melt flow rate or density
- Supplier lot variation
- Wrong blend ratio
- Recycled content with variable viscosity
- Bio-based or biodegradable grade processed like standard PE
What to check first
- Check material label, batch number and certificate.
- Compare MFR/MFI, density and drying requirements.
- Run a short trial with previous approved lot if available.
- Check if the same issue appears on another line.
Possible solutions
- Use the correct grade for the film structure.
- Update process window for the new lot.
- Control recycled content by incoming testing.
- Run LabEx film trials before changing production recipes.
- Keep approved material lists for each product.
Die drool and lip build-up
Typical symptom: Material builds up at the die lip and periodically releases into the film as streaks, specks or surface defects.
Likely causes
- Degraded polymer at the die lip
- Low molecular weight additives migrating to the surface
- Incompatible blend or masterbatch
- Die lip temperature too low or too high
- High shear stress at the die exit
- Poor die lip surface condition
What to check first
- Inspect die lip during run when safe.
- Check if deposits build faster with a specific material or colour.
- Compare additive and slip levels.
- Check melt temperature and die lip temperature.
Possible solutions
- Clean die lips carefully and regularly.
- Optimize die lip temperature and output.
- Use compatible masterbatch and additives.
- Consider a suitable PPA if approved for the application.
- Polish or repair damaged die lips.
Dirty or blocked air ring
Typical symptom: Bubble shape, frost line and gauge profile become uneven around the circumference. Local cooling marks may appear.
Likely causes
- Dust, polymer flakes or purge pieces in air ring
- Blocked filters or hoses
- Air ring not centred or level
- Uneven blower air flow
- Damaged baffles or plenum sections
What to check first
- Inspect air ring with bubble down.
- Check filters, hoses, seals and plenum cleanliness.
- Look for local high or low frost line areas.
- Compare gauge profile before and after air ring cleaning.
Possible solutions
- Clean air ring, filters, hoses and plenum.
- Centre and level air ring after die reaches operating temperature.
- Repair damaged baffles or seals.
- Keep area around the die clean to avoid debris entering the air system.
Frost line too high
Typical symptom: Bubble is tall and soft for too long. Film may show instability, poor gauge control, high haze or weak winding.
Likely causes
- Insufficient cooling
- Output too high for cooling capacity
- Melt temperature too high
- Air temperature too warm
- Air ring setting not suitable
- Material with high heat capacity or low crystallization rate
What to check first
- Measure frost line height and compare with approved recipe.
- Check cooling air temperature, blower output and filters.
- Check real melt temperature.
- Check if frost line moves when output changes.
Possible solutions
- Increase cooling or use chilled air if available.
- Reduce melt temperature or output within safe limits.
- Optimize air ring settings.
- Ensure IBC, if installed, is working correctly.
- Use LabEx testing to define a realistic output window for the material.
Frost line too low
Typical symptom: Film freezes too close to the die. Bubble may become stiff, clarity may suffer, and drawdown can become difficult.
Likely causes
- Cooling air too strong
- Melt temperature too low
- Output too low for cooling setting
- Air ring too close or too aggressive
- Material crystallizes too quickly
What to check first
- Compare frost line with target for the material.
- Check if bubble is stiff before proper orientation is developed.
- Check air ring opening and air velocity.
- Review melt temperature and output.
Possible solutions
- Reduce cooling air or adjust air ring setting.
- Increase melt temperature gradually if material allows.
- Increase output only if process and quality allow.
- Avoid freezing the bubble before stable orientation is formed.
IBC leakage or unstable internal bubble cooling
Typical symptom: Layflat width changes, bubble breathes, or gauge and cooling become unstable despite stable extruder pressure.
Likely causes
- IBC supply or exhaust leaks
- Incorrect sensor position
- Control valve hunting
- Blocked or unbalanced IBC air paths
- Nip leakage allowing air loss
- Unstable blower or temperature control
What to check first
- Check layflat trend against IBC valve movement.
- Inspect supply and exhaust hoses.
- Check sensor height and calibration.
- Check nip seal and bubble air leakage.
Possible solutions
- Repair leaks and secure hoses.
- Calibrate and position sensors correctly.
- Tune or service IBC control valves.
- Clean internal cooling paths.
- Stabilize nip sealing and bubble inflation control.
Poor purging after material or colour change
Typical symptom: Old colour, black specks, gels or incompatible material continue to appear after a changeover.
Likely causes
- Insufficient purge time
- Low flow in dead spots in adapter, die or screen changer
- Wrong purge material
- Temperature too low for effective cleaning
- Material left in the line during shutdown
What to check first
- Check where contamination appears: immediately, cyclically or after stops.
- Review last material and colour history.
- Inspect screen changer, adapter and die zones.
- Check purge procedure and temperature.
Possible solutions
- Use a defined purge procedure and enough material.
- Use a suitable purging compound for the material and temperature.
- Clean screen changer and die when purge is not enough.
- Use controlled shutdown to reduce degradation before the next start.
High motor load or high screw torque
Typical symptom: Motor current is higher than normal. Drive may alarm, output may be limited and melt temperature may increase.
Likely causes
- Material viscosity higher than expected
- Screen pack or die restriction
- Low barrel temperature causing high viscosity
- Too much filler or mineral loading
- Screw or gearbox mechanical problem
- Incorrect screw speed for material
What to check first
- Compare motor amps, head pressure and melt temperature.
- Check if high amps appeared after material or screen change.
- Verify barrel temperature actual values.
- Listen for gearbox or drive noise.
Possible solutions
- Check screen pack and melt path restriction.
- Increase temperature only where justified by viscosity.
- Reduce output if the motor is overloaded.
- Review material formulation and filler loading.
- Inspect mechanical drive if current remains high without pressure explanation.
LabEx Insight
When a new formulation gives high torque, high pressure or poor purging behaviour, a LabEx test can confirm whether the limitation is material viscosity, contamination, filtration or temperature window.
Temperature controller, heater or thermocouple faults
Typical symptom: Process becomes unstable even though setpoints look correct. Hot spots, cold zones, degradation or poor melting appear.
Likely causes
- Loose thermocouple
- Wrong thermocouple connected to wrong zone
- Burned heater band
- Controller not tuned or faulty
- Heater bands with different watt density in same zone
- Poor contact between heater and barrel or die
What to check first
- Compare actual temperature response to setpoint changes.
- Check zone wiring and thermocouple location.
- Measure heater current.
- Use a surface or melt temperature check where safe.
Possible solutions
- Repair wiring and replace defective heaters or thermocouples.
- Label and verify all zones.
- Ensure heater bands fit correctly.
- Tune controllers when overshoot or cycling is excessive.
- Do not rely only on HMI setpoints during troubleshooting.
Overtreatment or corona treatment damage
Typical symptom: Film seals poorly, blocks, has odour, surface damage or inconsistent converting performance.
Likely causes
- Corona power too high
- Film gap or treater setting incorrect
- Film speed changed without treatment adjustment
- Wrong side treated
- Sensitive seal layer exposed to too much treatment
What to check first
- Measure dyne level on both sides.
- Check treatment watt density against line speed.
- Confirm side orientation on roll.
- Check if heat seal issue started after treatment change.
Possible solutions
- Reduce treatment to required level.
- Control treatment with line speed.
- Confirm correct side treatment and winding direction.
- Keep treatment records by product.
- Separate printability needs from heat seal requirements.
Web wander after the nip
Typical symptom: Layflat moves sideways through rollers and winder. Edges may vary and roll build becomes poor.
Likely causes
- Nip rolls not parallel or not centred
- Gauge bands moving through collapsing frame
- Web guide not working correctly
- Uneven tension across the web
- Misaligned idler rollers
- Oscillating tower or rotation not synchronized
What to check first
- Check if wander starts before or after the main nip.
- Inspect nip roll alignment and pressure impression.
- Check web guide sensor and actuator.
- Check roller tram and rotation settings.
Possible solutions
- Align nip and downstream rollers.
- Correct the source of gauge bands and bubble movement.
- Service web guide components.
- Reduce excessive rotation speed when it causes instability.
- Keep tension even across the web.
Telescoping rolls
Typical symptom: Roll layers slide sideways and the roll end becomes cone-shaped or shifted.
Likely causes
- Winding tension too low or too high
- Poor web guiding
- Uneven gauge profile
- Core not straight or not gripped correctly
- Roll hardness too low
- Taper tension not suitable
What to check first
- Check roll hardness across the face.
- Check web guiding and edge position at the winder.
- Check core quality and chuck pressure.
- Review winding tension profile from start to finish.
Possible solutions
- Set correct winding and taper tension.
- Improve web guiding and edge control.
- Use correct cores and core locking.
- Correct gauge bands before winding.
- Adjust lay-on roller pressure and roll hardness.
Starring, crushed cores and roll deformation
Typical symptom: The roll shows star-shaped marks near the core, crushed core areas or deformation during storage.
Likely causes
- Initial winding tension too high
- Core too weak for roll weight
- Excessive lay-on pressure
- Film too soft or warm at winding
- Tension not reduced as roll diameter grows
- Poor storage or stacking
What to check first
- Inspect first layers near the core.
- Check core specification and diameter.
- Measure roll hardness near core and outer diameter.
- Check film temperature at winding.
Possible solutions
- Reduce initial winding tension and lay-on pressure.
- Use stronger or larger cores when required.
- Apply suitable taper tension.
- Improve cooling before winding.
- Avoid poor stacking or excessive storage pressure.
Loose rolls and soft winding
Typical symptom: Roll feels soft, layers slip, telescoping may occur and converting tension becomes difficult.
Likely causes
- Winding tension too low
- Lay-on pressure too low
- Film too slippery
- Incorrect taper tension
- Web guide instability
- Air trapped between layers at high speed
What to check first
- Check roll hardness profile.
- Review winding tension and lay-on pressure.
- Check COF and slip level.
- Observe roll build at different diameters.
Possible solutions
- Increase winding tension or lay-on pressure gradually.
- Optimize taper tension.
- Control slip and COF with formulation.
- Use proper lay-on roll settings to reduce air entrapment.
- Improve web guiding.
Hard rolls, blocking and crushed edges
Typical symptom: Roll is too tight, difficult to unwind, edges may deform and blocking risk increases.
Likely causes
- Winding tension too high
- Lay-on pressure too high
- Film wound too warm
- Taper tension too aggressive
- Nip pressure too high
- Excessive roll diameter or storage pressure
What to check first
- Check roll hardness and unwind force.
- Measure film temperature at winding.
- Check winding tension history.
- Inspect edges and core area.
Possible solutions
- Reduce winding tension and lay-on pressure.
- Use correct taper tension as roll diameter grows.
- Improve cooling before winding.
- Reduce nip pressure where possible.
- Define roll diameter limits for sensitive film.
Baggy edges or tight edges
Typical symptom: Edges do not lie flat. One or both edges may be loose, tight, wrinkled or difficult to wind.
Likely causes
- Poor collapsing geometry
- Gauge variation across web
- Misaligned collapsing frame or nip
- Uneven cooling and shrinkage
- Incorrect BUR or layflat control
- Roller misalignment
What to check first
- Check edge condition before the winder.
- Compare thickness at edge and centre.
- Check collapsing frame and nip alignment.
- Look for asymmetrical bubble contact.
Possible solutions
- Correct gauge profile and bubble centring.
- Align collapsing frame and nip rolls.
- Adjust collapsing frame angle.
- Stabilize cooling and frost line.
- Use proper trim and winding settings for edge quality.
Edge folds and crease lines
Typical symptom: Film develops folds near the edge or permanent crease lines that can disturb converting and printing.
Likely causes
- Collapsing frame too tight or misaligned
- Bubble not centred under nip
- Edge tension too high
- Guide rollers rough or misaligned
- Air trapped or poor layflat at nip
- High friction on collapsing frame
What to check first
- Watch the bubble entering the collapsing frame and nip.
- Check if crease is fixed to one side.
- Inspect frame surface and alignment.
- Check nip pressure uniformity.
Possible solutions
- Centre bubble and align nip.
- Adjust collapsing frame angle and gap.
- Clean and smooth contact surfaces.
- Reduce edge drag and tension imbalance.
- Repair rough rollers or frame surfaces.
Poor roll edge quality after slitting or trimming
Typical symptom: Roll edges are rough, wavy, fuzzy, uneven or generate dust during converting.
Likely causes
- Dull or incorrectly set trim knives
- Web wander
- Gauge variation near edge
- Wrong tension at trim station
- Film too soft or too warm
- Static pulling trim back to the roll
What to check first
- Inspect trim knives and trim removal system.
- Check edge position stability.
- Check film temperature and tension at trimming.
- Inspect dust or angel hair around trim.
Possible solutions
- Sharpen or replace knives and set correct overlap.
- Stabilize web guiding before trimming.
- Control tension and cooling.
- Remove trim cleanly and avoid recontamination.
- Use antistatic devices if trim sticks to the web.
Operator Insight
Wrinkles, scratches, telescoping and roll deformation should be traced from the final roll back through the winder, web path, nip, collapsing frame and bubble. Do not adjust the die before the defect source is located.
Tension variation during winding
Typical symptom: Roll quality changes from start to finish. Wrinkles, blocking, telescoping or hardness variation appear as diameter grows.
Likely causes
- Incorrect taper tension
- Winder drive or dancer instability
- Roll diameter measurement wrong
- Friction or bearing problems
- Line speed synchronization issues
- Core or chuck slipping
What to check first
- Trend tension during full roll build.
- Check dancer, load cell or torque control.
- Inspect core chuck and mechanical friction.
- Check if problem appears at same diameter every roll.
Possible solutions
- Tune winding control and taper tension.
- Service dancer, load cell, drive and chucks.
- Use correct core specification.
- Synchronize line and winder speed.
- Record winding recipe for each film type.
Static electricity and dust attraction
Typical symptom: Film attracts dust, shocks operators, clings to rollers or becomes difficult to wind and handle.
Likely causes
- Dry ambient air
- High line speed and roller contact
- Insufficient antistatic additive
- Poor grounding
- No ionization or antistatic equipment
- High friction in web path
What to check first
- Measure static level if equipment is available.
- Check grounding of rollers and treater.
- Inspect dust attraction areas.
- Check humidity and film formulation.
Possible solutions
- Install or service ionizers and grounding.
- Use suitable antistatic additive when allowed.
- Control humidity where possible.
- Reduce unnecessary friction and clean rollers.
- Keep dust sources away from the web path.
Odour, smoke or visible degradation
Typical symptom: Film or line has burnt smell, smoke, yellowing, black specks or degraded material during start-up or production.
Likely causes
- Melt temperature too high
- Long residence time during stops
- Dead spots in adapter, screen changer or die
- Material not thermally stable at current settings
- Oxidation from poor shutdown
- Heater control failure
What to check first
- Check real melt temperature and residence time.
- Look for black specks after stops or start-up.
- Check temperature overshoot and heater control.
- Review material thermal stability.
Possible solutions
- Lower unnecessary temperature and avoid long hot holds.
- Use controlled shutdown and purging procedures.
- Clean dead spots in the melt path.
- Use correct material and stabilizer package.
- Repair faulty heater controls.
Holes and pinholes
Typical symptom: Small holes appear in the film. They may be random or repeated and often create rejects in packaging applications.
Likely causes
- Contamination particles or gels breaking through the film
- Moisture or gas bubbles
- Weak spots from die lines
- Too much drawdown or very thin gauge
- Incompatible regrind or foreign polymer
- Mechanical puncture after the nip
What to check first
- Check if holes are present before or after collapsing.
- Inspect defect edges under magnification.
- Check moisture, gels and contamination levels.
- Check tension and contact points after the nip.
Possible solutions
- Improve filtration and material cleanliness.
- Dry materials properly and remove wet regrind.
- Reduce excessive drawdown or adjust thickness.
- Clean die lips and remove weak die lines.
- Inspect rollers and contact points for mechanical damage.
Coextrusion interfacial instability
Typical symptom: Multilayer film shows waves, zig-zag patterns, poor optical appearance, layer distortion or unstable barrier layer distribution.
Likely causes
- Layer viscosities too different
- Layer ratio not suitable
- Melt temperatures not balanced between extruders
- Excessive shear in feedblock or die
- Wrong tie layer or incompatible material
- Output imbalance between layers
What to check first
- Check each extruder output and melt temperature.
- Compare resin viscosity and MFI/MFR values.
- Inspect whether defect appears only in coextruded structure.
- Review layer ratio and die/feedblock design.
Possible solutions
- Adjust layer melt temperatures to improve viscosity matching.
- Change layer ratios or outputs gradually.
- Select more compatible resin grades or tie layers.
- Reduce excessive shear where possible.
- Use LabEx coextrusion trials to compare structures before scale-up.
Delamination or poor layer adhesion
Typical symptom: Layers separate during testing, converting, sealing or use. Barrier, seal or print layers may peel away.
Likely causes
- Incompatible polymers without suitable tie layer
- Wrong tie layer grade or thickness
- Contamination at interface
- Melt temperatures too low for bonding
- Excessive orientation or cooling before good adhesion
- Moisture in hygroscopic layers
What to check first
- Perform peel or adhesion test by layer.
- Check material compatibility and tie layer specification.
- Review layer temperatures and residence time.
- Check dryer records for PA, EVOH, PET or TPU layers.
Possible solutions
- Use correct tie layer and sufficient tie thickness.
- Improve material drying where needed.
- Adjust layer temperatures for good interfacial bonding.
- Remove contamination and purge properly.
- Test structures on a LabEx laboratory coextrusion line before production approval.
Unstable layflat width
Typical symptom: Film width changes during production. Width variation can disturb printing, bag making, slitting and roll quality.
Likely causes
- Bubble air leakage
- IBC control instability
- Nip leakage
- Bubble instability or breathing
- Output fluctuation
- Cooling air fluctuation
- Web guide or collapsing instability
What to check first
- Trend layflat width, bubble pressure and IBC valve position.
- Check nip seal and inflation system leaks.
- Check cooling air and output stability.
- Inspect frost line and bubble shape.
Possible solutions
- Repair air leaks and stabilize IBC.
- Stabilize extruder output.
- Check nip pressure and sealing.
- Improve cooling air consistency.
- Use automatic layflat control where justified.
Long start-up time and high start-up scrap
Typical symptom: The line takes too long to reach acceptable film quality after start-up or changeover.
Likely causes
- No standard start-up recipe
- Poor purging or residual material
- Die and air ring not thermally stable
- Uncontrolled first adjustments
- Material not prepared or dried
- Operators changing several variables at once
What to check first
- Review start-up records and time to good film.
- Check if the same defects appear at every start-up.
- Check material readiness, dryer status and purging.
- Verify die temperature stabilization before pulling good film.
Possible solutions
- Use a documented start-up procedure.
- Prepare material, screens, tools and settings before start.
- Allow die and air ring to reach stable temperature.
- Change one variable at a time and record results.
- Use LabEx trials to define starting process windows for new materials.
Unstable dosing or blender variation
Typical symptom: Film quality changes slowly during the run. Colour, gauge, sealing behaviour or layer performance drifts even when the extruder settings appear unchanged.
Likely causes
- Gravimetric blender not calibrated or not feeding consistently
- Masterbatch or additive bridging in the dosing unit
- Regrind bulk density changing during production
- Wrong recipe selected on the dosing system
- Material flow pattern in hopper is not stable
- Operator correction made at the feeder without recording it
What to check first
- Compare actual dosing values with the recipe.
- Check blender alarms, calibration status and feeder refill behaviour.
- Inspect whether masterbatch, additive or regrind is bridging.
- Check if the defect changes when dosing is run with virgin material only.
Possible solutions
- Calibrate the gravimetric blender and verify each component feeder.
- Clean dosing screws, hoppers and material contact areas.
- Control regrind particle size and bulk density.
- Lock approved recipes and record all dosing changes.
- Use laboratory trials to confirm additive level before production changes.
Dust, fines or angel hair in material conveying
Typical symptom: Small specks, unstable feeding, blocked filters or increased screen pressure appear after material transfer or when regrind is used.
Likely causes
- Too high conveying air velocity
- Sharp bends or long conveying pipes creating friction heat
- Regrind with too many fines
- Dust from bags, silos or material handling equipment
- Dirty filters or poor separator cleaning
- Contaminated conveying line after material change
What to check first
- Inspect vacuum loader filters and material receiver.
- Check pellets and regrind visually for fines and stringers.
- Look inside bends and conveying pipes for angel hair build-up.
- Check whether the defect increases after conveying or regrind addition.
Possible solutions
- Reduce conveying velocity where possible.
- Clean filters, receivers and conveying lines.
- Use better regrind screening or dedusting.
- Install streamer traps or improved elbows when angel hair is repeated.
- Improve material handling procedures during material changes.
Scale-up Insight
LabEx results should be used as a strong technical starting point. Final production settings may still need adjustment because screw design, shear rate, die size, cooling capacity and line speed are different.
Special troubleshooting notes for recycled materials
Recycled materials can behave differently from virgin material because the input stream may contain different polymer grades, degradation levels, moisture, contamination, fillers, printing ink, fines and dust. Before changing the die or air ring, check whether the material itself is stable.
Control contamination
Check black specks, hard particles, paper, metal, dust, cross-contamination and screen pressure increase. Dirty material often appears as gels, holes, die lines and unstable filtration.
Check melt flow variation
PCR and PIR materials may have variable viscosity. This can influence output, head pressure, bubble stability, heat seal and mechanical properties.
Check moisture and volatiles
Wet regrind, printed film waste and poorly stored material can create bubbles, voids, odour, smoke and surface defects.
Use LabEx trials
LabEx testing can compare material lots, recycled content, filtration level and process window before production time is used.
Special troubleshooting notes for bio-based and compostable films
Bio-based and compostable film materials should not automatically be processed like standard PE. Materials such as PLA blends, starch blends, PHA and compostable compounds can be sensitive to moisture, residence time and thermal degradation.
Drying and handling
Moisture-sensitive materials should be dried according to the supplier recommendation and handled in a way that avoids re-absorption before processing.
Temperature window
Use a controlled temperature window. Too low temperature can cause poor melting and gels. Too high temperature or long residence time can cause degradation, odour and black specks.
Bubble stability
Some bio-based or compostable grades have different melt strength than PE. Bubble stability, frost line and drawdown should be verified by practical trials.
LabEx validation
A LabEx blown film line is useful for testing new bio-based formulations, additives and film structures before production scale trials.
Need financing for a LabEx laboratory extruder?
Green Extrusion Technology can help discuss machine configuration, budget level and possible financing routes. Danish customers may also review relevant options with EIFO.
Prevention checklist before a production run
Good troubleshooting starts before the defect appears. Use a practical checklist at start-up, order change and shift change.
Material
Confirm correct resin grade, lot number, additive package, colour masterbatch, regrind ratio, dryness and contamination control.
Extruder
Check screw speed, motor load, melt pressure, real melt temperature, feed throat cooling, screen pack history and heater function.
Die and air ring
Check die centring, die lip cleanliness, die temperature zones, air ring centring, air filters, hoses, IBC and cooling balance.
Tower
Check bubble cage, collapsing frame, nip alignment, roller rotation, drafts, static, web tension and clean contact surfaces.
Winder and treatment
Check corona treatment, nip pressure, winding tension, taper tension, roll hardness, slitting, cores and roll handling.
Records
Keep a good run record for each product. It is one of the best tools for finding deviations when a problem returns.
How LabEx helps material and process troubleshooting
A production blown film line is expensive to stop and difficult to use for small trials. LabEx gives your team a practical and controlled way to test materials, develop recipes and understand process behaviour before moving to full-scale production. It helps reduce waste, save production time and make material development more structured.
With a LabEx laboratory blown film line, you can compare material lots, recycled content, drying conditions, pigment dispersion, seal layer behaviour, bubble stability, clarity, gels and melt temperature window using much smaller material quantities. The result will not be a perfect copy of every production parameter, because screw design, shear rate, die size, cooling and line geometry are different. But the results give a strong technical starting point and help you move to full-scale production with much better preparation.

Top questions about blown film extrusion issues
What is the best first step when troubleshooting blown film extrusion?
Start by naming the defect and locating where it first appears. Keep a film sample, record the actual process settings and change only one parameter at a time.
Why are blown film defects difficult to solve?
Material, screw speed, melt temperature, die flow, cooling air, bubble air, nip speed and winding tension are connected. One change can affect several quality points at the same time.
How can LabEx laboratory extruders help troubleshooting?
LabEx laboratory extruders allow processors, material suppliers and researchers to test materials, additives, colours, recycled content and processing windows in a controlled way before using a production line.
Can LabEx results be used before production trials?
Yes. LabEx results give a strong technical foundation for production trials. The results help identify suitable temperatures, bubble stability, clarity, gels, sealing behaviour and material limitations before scale-up.
What causes gauge variation in blown film?
Common causes include extruder surging, a non-centred die, uneven air ring cooling, die temperature variation, dirty die lips, bubble instability and external air drafts.
What causes bubble instability?
Bubble instability can come from unstable output, incorrect frost line height, unbalanced air ring, IBC control problems, external drafts, poor bubble cage setup or low melt strength material.
What causes gels and black specks?
Gels and black specks can come from degraded polymer, long residence time, hot spots, material hang-up, poor melting, contamination or inadequate filtration.
How should recycled content be checked before blown film production?
Check regrind size, fines, moisture, contamination, MFI/MFR variation, screen pressure trend and film appearance. LabEx trials are useful before changing production recipes.
What should be checked when processing bio-based or compostable film materials?
Check drying requirements, melt temperature window, residence time, thermal stability, bubble stability, seal behaviour and degradation risk. Do not process them like standard PE without verification.
What causes wrinkles in blown film?
Wrinkles often come from gauge variation, bubble instability, poor collapse, misalignment, excessive tension, rough contact surfaces or wrong collapsing frame angle.
Should wrinkle troubleshooting start at the die?
Not always. A practical method is to start at the winder and work upstream zone by zone. This helps locate where the wrinkle first appears.
What causes poor heat seal?
Possible causes include wrong seal material, overtreatment, high slip or antiblock, oxidation, gauge variation or incorrect sealing bar conditions downstream.
When should Green Extrusion Technology be contacted?
Contact Green Extrusion Technology when you need a LabEx laboratory blown film line, a material testing setup, extrusion components, purging support or a quotation for defined machine requirements.
Get one monthly Know How update
Receive practical information about polymers, blown film testing, LabEx machines, recycling and market updates. One useful update per month, not a full inbox.
Sources
This article is based on Green Extrusion Technology’s own extrusion experience. Any production limit or material setting should be confirmed against the specific material supplier data sheet and the actual machine configuration.