
Beginner’s Guide to Blown Film Extrusion
A clear beginner guide to blown film extrusion, from pellets, screw and barrel to die head, film bubble, cooling, haul-off, winding and basic operator checks.
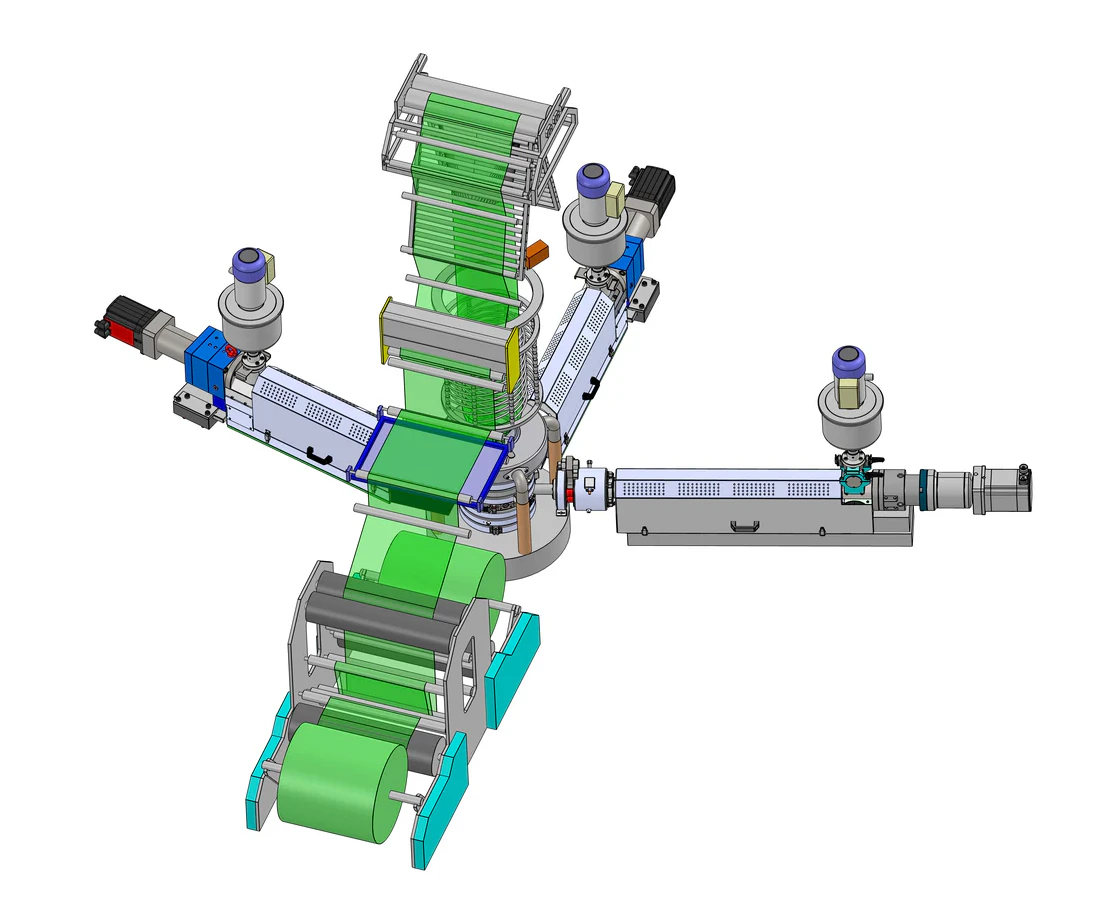
What is blown film extrusion?
Blown film extrusion is a process used to make thin plastic film. The film can be used for bags, packaging film, shrink film, agricultural film, hygiene film, lamination film and many other flexible packaging products.
The basic idea is simple: plastic pellets are heated until they become a melt. The melt is pushed through a circular die head, inflated with air into a bubble, cooled, flattened and wound onto a roll.
The process looks simple from the outside, but film quality depends on many connected details: raw material, screw design, temperature profile, melt pressure, die gap, air cooling, bubble stability, haul-off speed and winding tension.
The process in one sentence
A blown film line changes plastic pellets into a controlled tube of hot film, cools the tube as a stable bubble, then flattens it into lay-flat film for winding or further converting.

The process in 8 simple steps
1. Plastic pellets or granules are loaded into the machine, sometimes together with colour masterbatch, additives, recycled pellets or bio-based compounds.
2. The screw turns inside the heated barrel and moves the material forward while it melts and mixes.
3. The melt normally passes through screens, while pressure and temperature sensors help protect the machine and show whether the process is stable.
4. The die head forms the molten plastic into a circular tube.
5. Air inflates the tube into a bubble, and the air ring cools the hot film.
6. The bubble is guided through a collapsing frame and pulled by the take-off unit.
7. Some films are corona treated when the surface must later be printed, laminated or glued.
8. The finished lay-flat film is wound onto rolls for storage, converting or further processing.
1. Raw material handling
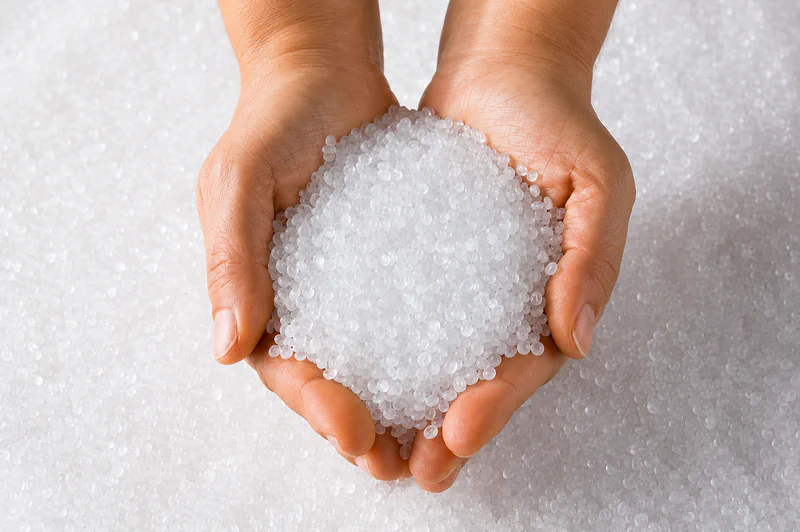
The process starts with plastic pellets or granules. Common materials for blown film include LDPE, LLDPE, HDPE, metallocene PE, PP in selected applications, PE-based recyclates, colour masterbatch and functional additives.
Material can be loaded manually from bags or automatically from silos, boxes, dryers or dosing systems. Vacuum loaders are often used to move pellets through pipes into hoppers or blenders.
When recipes contain several components, a gravimetric blender can dose each material by weight. This helps keep colour, additive level and film properties more consistent from batch to batch.
Drying is not normally required for standard PE materials, but it can be important for hygroscopic polymers or compounds. The material supplier data sheet should always be checked before processing.
2. Feeding and melting inside the extruder
The hopper feeds pellets into the extruder. Inside the extruder, a rotating screw moves the material forward through the heated barrel.
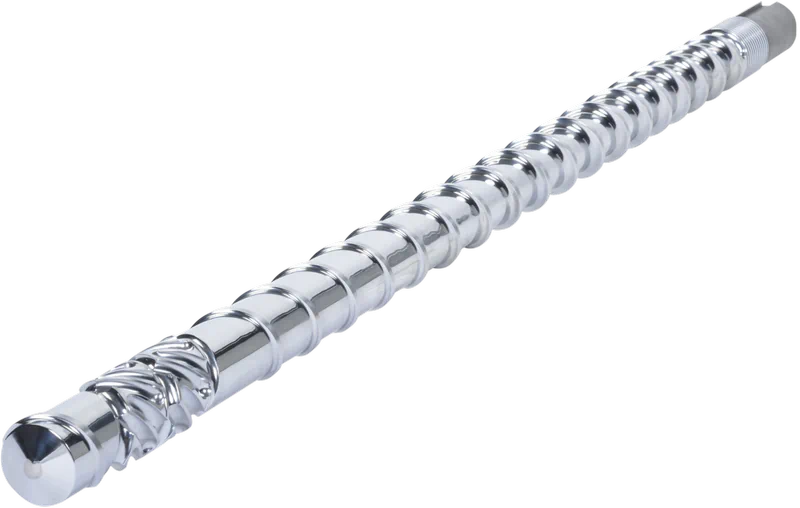
The screw has three basic jobs: transport the pellets, melt the material and make the melt as uniform as possible before it reaches the die head. Many screws are divided into a feed zone, compression zone and metering zone.
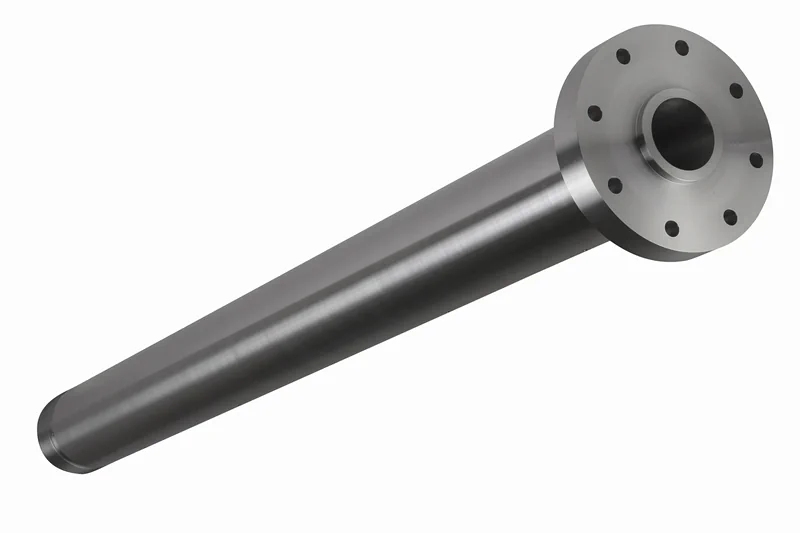
The barrel is the steel cylinder around the screw. It is divided into heating zones, so the temperature can be controlled along the length of the extruder. Some barrels also use a grooved feed zone to improve feeding performance.
Barrel heaters start the process, but a large part of the melting energy also comes from mechanical shear between the screw, barrel and polymer. This is why screw speed, material viscosity and temperature settings influence each other.
3. Filtration and sensors
After the material has melted, it normally passes through a screen pack, manual screen changer or continuous screen changer. The screens catch contamination, unmelted particles or other unwanted material before the melt enters the die.
Melt pressure sensors and temperature sensors are important. High pressure can indicate a blocked screen, too low melt temperature, high viscosity, contamination or another restriction in the flow path.
For new operators, melt pressure and melt temperature are two of the most important values to watch. They show whether the line is stable or starting to move away from normal operation.
With recycled materials, pressure can change more quickly because contamination level, melt flow index and material composition may vary from batch to batch.
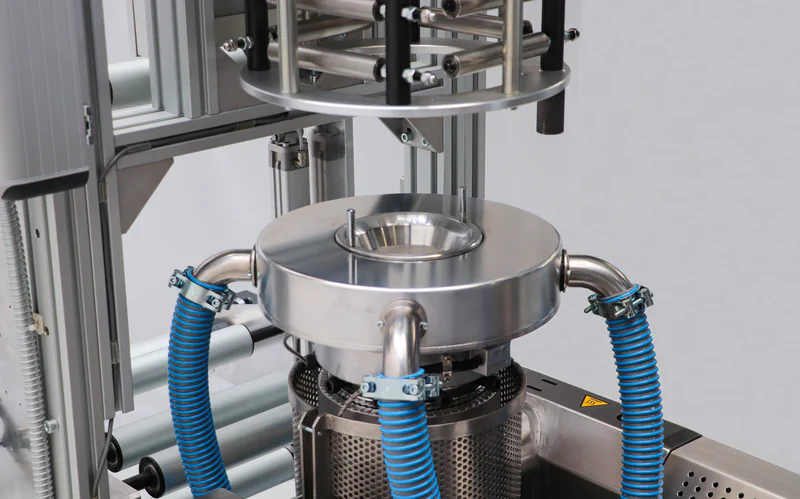
4. Die head: forming the tube
The die head is the part where the melted plastic leaves the extruder and becomes a tube. Air is introduced inside the tube to inflate it into a bubble.
A mono-layer die makes one film layer. A multi-layer die combines melt from two or more extruders to make film with several layers. Multi-layer films are often used when one material alone cannot provide all the required properties.
Examples include films with a sealing layer, stiffness layer, recycled core layer, colour layer or barrier layer. Barrier materials such as EVOH are normally used inside multilayer structures together with suitable tie layers and support materials, not as a simple stand-alone film layer.
Die design, melt distribution and die gap adjustment have a strong influence on thickness variation around the bubble.

5. Film bubble, air ring and frost line
The air ring cools the hot tube of plastic as it leaves the die. Cooling must be even around the bubble. Uneven cooling can create thickness variation, unstable bubble movement, wrinkles and other film quality problems.
The frost line is the area where the molten film becomes more solid. Operators often use the frost line as a visual sign of how the process is running.
If the frost line moves up or down without a planned process change, the operator should check melt temperature, output, cooling air, ambient air and material consistency.
Some lines also use internal bubble cooling, called IBC, where air is controlled inside the bubble. This can improve cooling capacity and bubble stability on larger or faster lines.

6. Collapsing frame and take-off unit
The bubble moves upward to the collapsing frame. This frame gently changes the round bubble into flat film. The take-off unit, also called the haul-off, pulls the film at a controlled speed.
The nip rollers close the bubble and pull the lay-flat film forward. If the nip pressure, roller alignment or collapsing frame is not correct, the film can develop wrinkles, scratches, uneven tension or poor roll quality.
Some haul-off systems rotate. A rotating haul-off can help distribute thickness variation around the roll instead of keeping it in one fixed lane.
7. Corona treatment, if the film must be printed or laminated
Polyolefin films such as PE often have low surface energy. This means printing ink, adhesive or coating may not bond well to the surface without treatment.
Corona treatment changes the film surface so that it becomes easier to print, laminate or glue. It is not required for every film, but it is common in many packaging applications.
New operators should understand that corona treatment does not correct poor film quality. It only prepares the film surface for the next process.
8. Winding and machine control
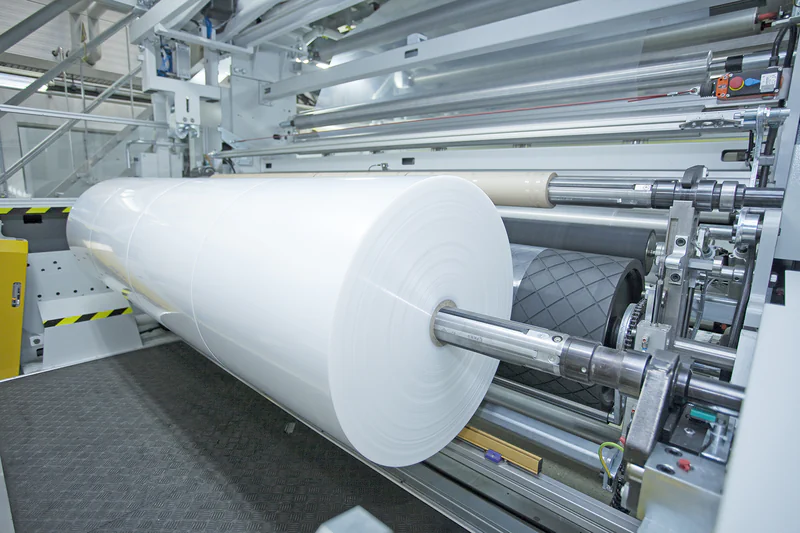
After the film is flat, it is guided to the winder. The winder must control roll tension so the film roll is stable, smooth and not too tight or too loose.
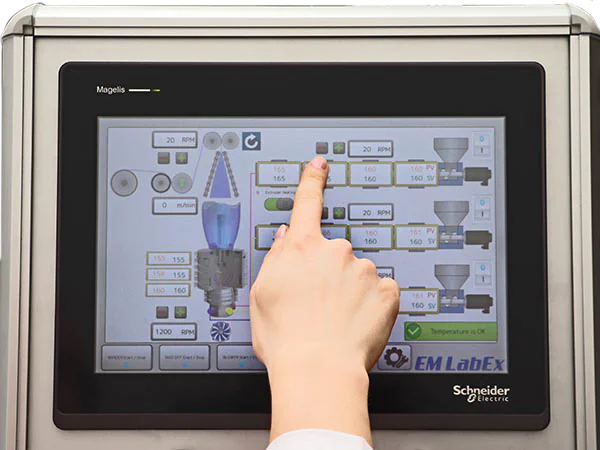
Operators use the HMI, or Human Machine Interface, to monitor temperatures, speed, pressure, alarms and recipes. A good HMI does not replace process understanding, but it helps the operator run the line in a controlled way.
Good production practice is to record the settings when the line runs well. This makes it easier to repeat the job later and to understand what changed when a problem appears.
The main machine parts and what they do
| Machine part | Main function | What the operator should watch |
|---|---|---|
| Hopper and loader | Feed pellets or granules into the extruder. | Bridging, wrong material, poor dosing or unstable feed. |
| Screw | Transport, melt, compress and mix the polymer. | Unstable output, poor melting, gels or excessive shear heat. |
| Barrel and heaters | Control the thermal environment around the screw. | Too low temperature, overheating, wrong temperature profile. |
| Screen pack or screen changer | Filter contamination and protect the die head. | Rising melt pressure, blocked screen, contamination in film. |
| Melt pressure sensor | Shows resistance in the melt flow path. | Sudden pressure rise, unstable pressure, unsafe operation. |
| Die head | Forms the melt into a circular tube. | Thickness variation, die lines, poor melt distribution. |
| Air ring | Cools the bubble from outside. | Unstable bubble, uneven cooling, gauge variation. |
| Collapsing frame and nip rollers | Flatten and pull the film tube. | Wrinkles, scratches, poor lay-flat, uneven tension. |
| Winder | Winds the finished film into rolls. | Hard rolls, telescoping, wrinkles or roll blocking. |
| HMI and controls | Set and monitor temperatures, speeds, pressure and alarms. | Wrong recipe, missed alarms, poor repeatability. |
Common words new operators should know
| Word | Simple explanation |
|---|---|
| Blow-up ratio (BUR) | The relationship between bubble diameter and die diameter. It influences film orientation, width and properties. |
| Draw-down ratio | The relationship between die gap and final film thickness. It is linked to haul-off speed and output. |
| Frost line | The visible area where the film changes from molten to more solid. |
| Gauge variation | Variation in film thickness across the width or around the bubble. |
| Lay-flat width | The width of the flattened film tube after the nip rollers. |
| Melt pressure | Pressure of the polymer melt before the die or screen pack. |
| Neck-in | Width reduction after forming or cooling, more common in cast film but useful for beginners to know. |
| Nip rollers | Rollers that close the bubble and pull the film forward. |
| Output | The amount of material processed per hour, often measured in kg/h. |
| Recipe | Saved process settings for a product or material. |
How main settings influence the film
| Setting | Typical influence |
|---|---|
| Screw speed | Usually increases output, but also changes shear heating and melt pressure. |
| Barrel temperature | Influences melting, viscosity, pressure and melt stability. |
| Die temperature | Influences melt flow at the die and can affect die lines and film appearance. |
| Cooling air | Influences frost line height, bubble stability and production rate. |
| Haul-off speed | Influences film thickness together with output and die gap. |
| Bubble air | Controls bubble diameter and lay-flat width. |
| Winding tension | Influences roll quality, wrinkles and film blocking. |
Simple operator checks before and during production
- Check that the correct material, masterbatch and recipe are loaded.
- Check hopper level and material flow before starting production.
- Confirm that barrel and die temperatures have reached setpoint and are stable.
- Watch melt pressure and look for sudden pressure changes.
- Look at bubble stability, frost line position and air ring cooling.
- Check that the collapsing frame and nip rollers are clean and aligned.
- Check film width, film thickness and roll quality during the run.
- Check winding tension and make sure the roll is not too hard or too loose.
- Record settings when the line is running well, so the job can be repeated more easily.
What laboratory blown film lines are good for
Laboratory blown film lines are useful for operator training, material testing and process development before using production machines for trials.
They are especially useful when testing new polymer grades, recycled pellets, bio-based materials, additives, colour masterbatch or multilayer structures. You can test the material in a controlled way and gain practical process knowledge before moving to full-scale production.
Laboratory results reduce risk, but they do not automatically guarantee identical performance on a production line. Screw design, die geometry, cooling capacity, haul-off design and line speed can be different. Final optimisation is normally completed during production scale-up.
Final words
A blown film line is a complete system. The feeding section, screw, barrel, filtration, die head, air ring, bubble, haul-off and winder must work together.
When new operators understand each part, it becomes easier to run the line in a controlled way, recognise problems early and communicate clearly with process engineers, maintenance staff and material suppliers.
The best way to learn is to connect what you see on the machine with the basic process steps: material in, melt preparation, film forming, cooling, flattening and winding.
FAQ
Is blown film extrusion difficult to learn?
The basic process is easy to understand, but stable production takes practice. New operators should first learn the machine parts, then the main process settings and common quality problems.
Which polymers are most common in blown film?
LDPE, LLDPE and HDPE are very common. Many films also use blends, masterbatch, additives, recycled PE and selected bio-based or biodegradable materials.
Why does the film bubble move or become unstable?
Common causes include uneven cooling, unstable output, wrong temperature settings, air flow changes, poor material consistency or mechanical problems in the haul-off area.
Why is melt pressure important?
Melt pressure shows how difficult it is for the material to pass through the screen pack, die and flow path. A sudden increase may indicate contamination, blocked screens or material changes.
Can lab blown film results be copied directly to production?
Laboratory tests give very useful information, but production lines are different in size, cooling capacity, screw design and line speed. The results should be used as a strong guide, not as a guarantee.
Building knowledge before production trials?
Green Extrusion Technology supplies laboratory extruders and blown film lab lines for operator training, material testing and small-scale development work.
See LabEx laboratory extruders Contact Green Extrusion Technology